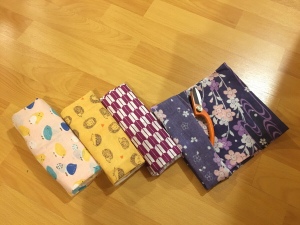
In the last post, we have briefly discussed about the hasami and the special care it requires. One of the key point is keep them dry as much as possible by wiping it down in between cuts during use. I figured out the best way is to make a fabric case for the hasami which means I will always have a “cloth” close by. This case is made by folding a traditional Japanese towel, Tenagui “手拭”. There is no sewing involved so the towel can be unfolded for wiping up spills or for washing after use. These towels are pretty stand in size and fabric. They are mainly made with thin cotton, therefore very absorbent and easy to clean. Mostly size around 35cm x 90cm long. I have a collection of them that I use them frequently for wrapping up things like I would with furoshiki. Some of them I purchased from Japan and most of them I got them from Diaso which sell them for AUD$2.80 each (I know they are meant to be just ¥100 😑) here in Melbourne. I did not design this folding method. I adopted it from a video from YouTube that shows the instruction to make a wallet from the towel. Here is the video for your reference:
http://bit.ly/ikebanacase
And here is my step by step guide. It is just a slightly modified version of the one in the video so that it will fit the hanabasami with the ikenobo style handles. Enjoy!
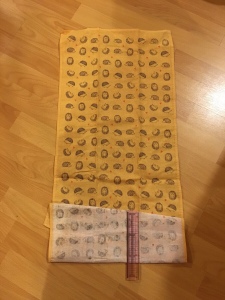
1. Layout your towel. If the pattern is directional, you might want to think about which way you want.

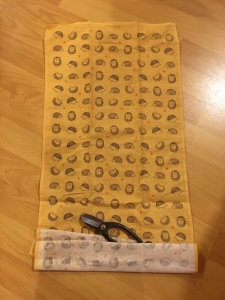
2. Fold the bottom edge up like this. Dose not have to be precise.

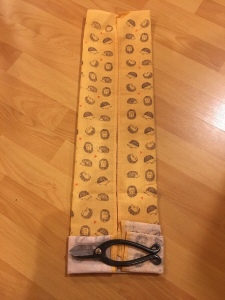
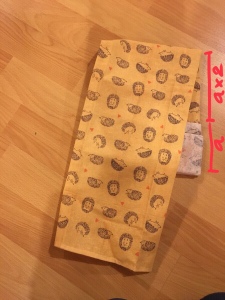
3. Now fold up again. But this time you want the middle to be approx more than 12cm. Do not have to be precise. About the 2 times the width of your hanabasami.
4. Fold up again, and this time the fold should be deep enough to hold your hanabasami. Just put yours in for sizing.
5. Flip the whole towel around carefully not to undo the folds you have already done. Lay your hanabasmi in the middle so that you know how far to fold the sides towards the middle. Since not all tenagui are exactly the same width, this will help make sure the case will fit your hanbasami.

6. My tenagui is wide and so the sides meet in the middle.
7. Put aside your hanabasami and fold the top edge down following to the dimension I have marked on the photo.
![]()
8. Fold the remaining part of the tenagui back up again with the new fold line aligning with the fold behind. Depending how deep your have made your pocket and the length of the tenagui, the top edge of your towel might not be the same as my photo here.
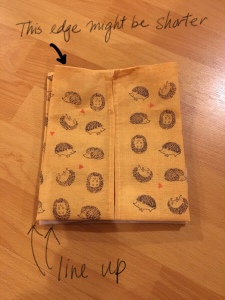
9. Tuck the top layer into the folds behind.
10. Fold down the top layer.

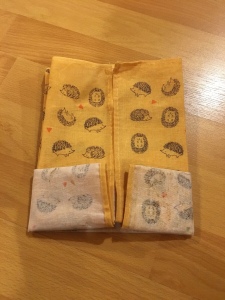
11. Flip the whole thing around. You can see the pocket is formed already!

12. Tuck the top edge of the towel (which is now hanging at the bottom) into the space behind the pocket for your scissors.

13. It is done! To use, put you hanabasami in. With this design, there are two compartment you can use. I like to put mind in the “back” compartment because there is more folds of fabric to cover the tip of the blades.

14. To close the case, just ring the flap down and tuck in into the bottom.
![]()

